Let’s be honest, trying to run your revenue engine with Mailchimp and HubSpot operating in separate universes is a recipe for disaster. It’s the digital equivalent of your marketing and sales teams sitting in the same room but speaking different languages. This integration is all about creating that crucial bridge, moving your RevOps from frustrating data silos to a genuine single source of truth.
When we talk about syncing data, we’re not just talking about names and email addresses. We’re talking about the whole story: contact updates, campaign activity, and every engagement metric that tells you what your audience actually cares about.
Why Bother Integrating Mailchimp and HubSpot?
For any RevOps team worth their salt, the goal is a seamless customer journey fueled by solid data. But when your email platform and your CRM aren’t talking, you’re flying blind. This disconnect isn’t just a minor technical headache; it creates very real, and often embarrassing, business problems.
Think about it. Has your sales team ever called a lead who unsubscribed from a Mailchimp newsletter just an hour before? Or has marketing ever blasted a re-engagement campaign to a list of customers already in the final deal stages in HubSpot? These aren’t just hypotheticals—they happen all the time. More than just being inefficient, these slip-ups actively erode customer trust and waste valuable time.
A well-executed Mailchimp integration with HubSpot smashes down those walls. It’s about building a single, cohesive system where every person on your team sees the full picture.
A great place to start exploring your options is the HubSpot App Marketplace. You’ll quickly see that connecting tools isn’t just an afterthought; it’s a core part of how modern businesses grow.
The sheer number of apps available shows just how important a connected tech stack is for scaling your operations.
The Real-World Wins of a Unified Stack
When data flows freely between these two powerhouses, you unlock some immediate, tangible benefits. Forget about soul-crushing manual data entry and wrestling with CSV uploads. That time can now be spent on work that actually moves the needle. Plus, automation dramatically cuts down on human error, which means you can finally start trusting your data.
You’ll see a massive improvement in your email marketing efficiency right away. Lists stay clean and updated automatically, which directly boosts deliverability and engagement. Inside HubSpot, your team gets a clear view of how contacts are interacting with Mailchimp campaigns—opens, clicks, unsubscribes—all of which can feed right into your lead scoring and help sales prioritize the hottest leads. You can find more practical examples of why this is a top integration for growing businesses on project36.io.
For RevOps, this integration is the bedrock of a predictable revenue engine. It means your lead scoring is sharp, your segmentation is powerful, and the handoff from marketing to sales is truly seamless.
At the end of the day, this isn’t just about connecting two apps. It’s a strategic move that directly boosts your bottom line by making your teams more efficient, your marketing more intelligent, and your sales reps more informed.
Choosing Your Integration Path: Native vs. Custom
When it comes to connecting Mailchimp and HubSpot, the very first decision you make is the most important one. Are you going with a native, off-the-shelf connector, or are you rolling up your sleeves for a custom build? There’s no single right answer here—the best path is the one that lines up with your team’s skills, your budget, and what you actually need the data to do.
For a lot of teams, especially if you’re just trying to get something up and running, a native connector or a middleware tool like Zapier makes a ton of sense. You can get a basic one-way sync going—pushing new HubSpot contacts into a Mailchimp list—in less than an hour, all without a single line of code. It’s fast, it’s simple, and it gets the job done for straightforward use cases.
But that speed comes with a catch. Native connectors can be incredibly rigid. They might only sync the basics: first name, last name, and email. The second you need to sync custom HubSpot properties to segment your audience in Mailchimp, you’ll feel the walls closing in.
When a Custom Build Becomes the Only Option
So, when do you take the leap to a custom integration? It’s usually when your business logic gets too complex for the pre-built tools.
If you need a true bi-directional sync—where an updated email in Mailchimp or an unsubscribe automatically updates the contact record in HubSpot—you’re in custom-build territory. The same goes for handling custom objects or any kind of complex data mapping.
Let’s say you need to translate a HubSpot “Lead Status” picklist into a specific set of Mailchimp tags. No native connector is going to handle that kind of specific business rule for you. A custom solution using APIs and webhooks gives you total control to build those rules yourself, ensuring your data flows exactly how your operations demand. It’s this control that unlocks truly sophisticated automation and segmentation.
This fork in the road is a classic RevOps dilemma: do you stick with disconnected data and deal with the fallout, or do you build the bridges that fuel growth?
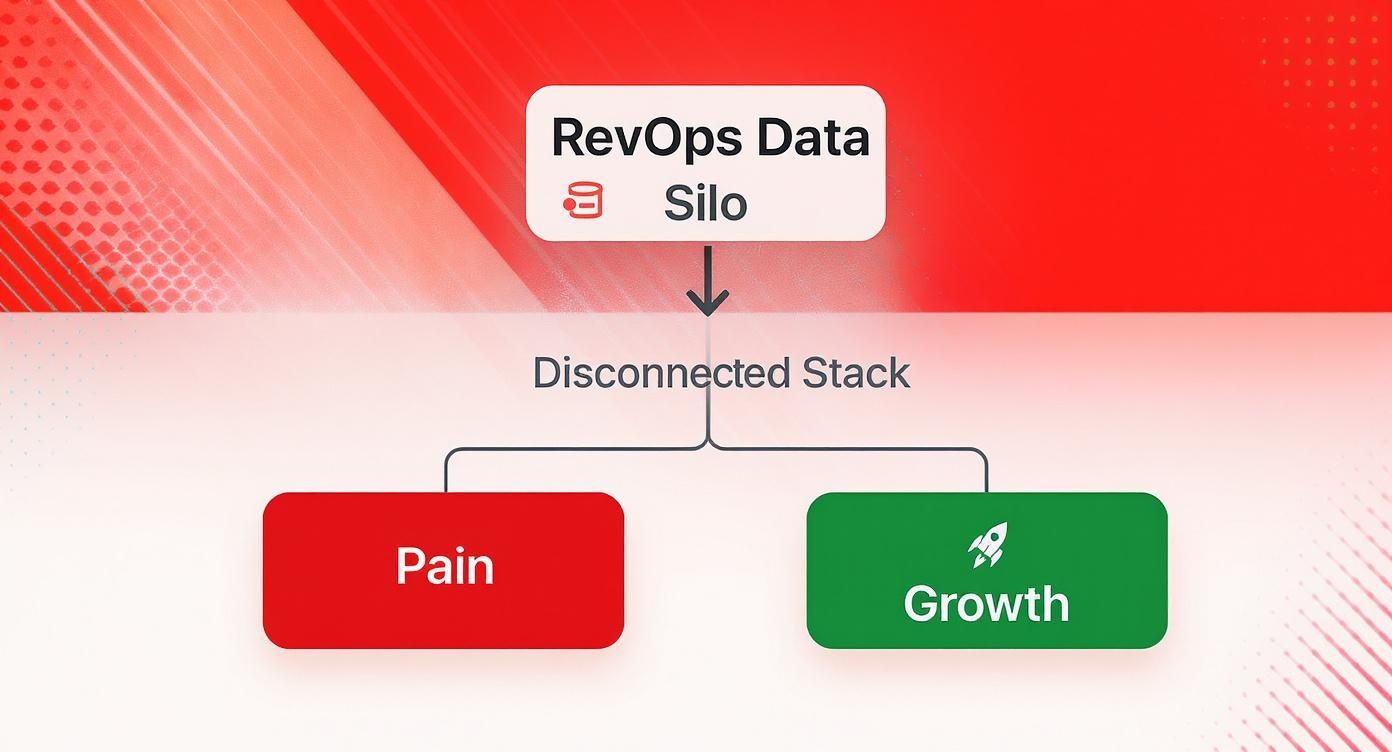
As the diagram shows, you’re either creating friction with data silos or creating real business momentum with a connected stack. The choice is yours.
Figuring Out Your Needs and Resources
Before you commit one way or the other, you need to have an honest chat with your team. Get real about your technical skills and what this integration truly needs to accomplish.
Start by asking these questions:
- What are our non-negotiable data points? Make a list of every single field that must sync. The minute you add custom properties to that list, you’re leaning heavily toward a custom build.
- Which way does the data need to flow? Is a simple one-way push from HubSpot to Mailchimp enough? Or is a two-way, bi-directional flow critical for your sales and marketing teams to stay aligned?
- Do we actually have the tech skills in-house? Building from scratch means you need engineers who are comfortable with APIs, webhooks, error handling, and the long-term maintenance that comes with it. If not, a native connector is a much safer bet. You can explore our guide on other key marketing automation integrations to see how this decision fits into your wider tech stack.
- What’s our real budget and timeline? Native tools are cheaper and faster to get started, but a custom build is a serious investment in development hours and ongoing support.
I’ve seen it happen time and again: a team picks a native connector to save time, only to burn months trying to create clunky workarounds for its limitations. Be brutally honest about your needs from day one to avoid having to rebuild it all later.
The platform ecosystems themselves also give you a hint. As of 2025, HubSpot’s marketplace boasts over 1,700 integrations, while Mailchimp’s has around 335. This shows how HubSpot is positioned as a central CRM hub. Thanks to its ability to store rich behavioral data, some HubSpot-centric setups have seen email deliverability rates climb as high as 92%—a big leap from the average. This broader ecosystem means you might find a more powerful third-party connector built for HubSpot if the official one doesn’t cut it.
Building a Custom Sync with APIs and Webhooks
https://www.youtube.com/embed/p4EuCWgEduY
So, the pre-built connectors just aren’t cutting it for your specific business logic. It happens. This is when you roll up your sleeves and build your own bridge. Constructing a custom Mailchimp integration with HubSpot using APIs and webhooks puts you in the driver’s seat, giving you total control over how your data moves. Forget drag-and-drop interfaces; we’re talking about writing solid, production-grade code for a sync that’s built for your exact needs.
The whole architecture really boils down to two key components: scheduled API calls for the big-picture data alignment and real-time webhooks for the instant, “this-just-happened” updates. I like to think of the API as the nightly janitor, doing a thorough sweep to make sure everything is where it should be. Webhooks, on the other hand, are your on-duty security guards, reporting events the moment they occur.
Architecting Your Custom Integration
A good custom integration is born from a clear plan. The first, and most important, thing you need to do is decide which system is the “source of truth” for different data points. For instance, you might decide HubSpot owns all the core contact properties, but Mailchimp is the definitive source for email engagement data like subscription preferences.
Making this call from the get-go helps you dodge the dreaded infinite loop—where an update in HubSpot triggers an update in Mailchimp, which then dutifully triggers the original update in HubSpot. Seriously, defining data ownership upfront will save you a world of headaches.
Typically, your first build will involve a script to pull all your contacts from one system and push them to the other. This creates your baseline. Once that initial bulk sync is done, the integration can flip over to an event-driven model that runs on webhooks.
Leveraging APIs for Batch Updates and Initial Syncs
Both HubSpot and Mailchimp have fantastic REST APIs that will be the foundation of your custom build. Job number one is getting authentication sorted out. HubSpot generally uses private app tokens or OAuth 2.0, while Mailchimp relies on API keys. It should go without saying, but please store these credentials securely in a secret manager.
With authentication handled, you can get down to business. A really common task is fetching a list of all contacts that have been updated in HubSpot recently.
Here’s a quick look at what a Python snippet might look like for grabbing contacts modified in the last day from HubSpot’s API:
from hubspot import HubSpot from datetime import datetime, timedelta
Assumes hubspot_client is already authenticated
api_client = HubSpot(access_token=‘YOUR_ACCESS_TOKEN’)
Calculate yesterday’s date for the query
yesterday = datetime.now() - timedelta(days=1) query_date = yesterday.strftime(‘%Y-%m-%dT%H:%M:%S.%fZ’)
try: # Search for contacts updated since yesterday search_request = { “filterGroups”: [ { “filters”: [ { “propertyName”: “lastmodifieddate”, “operator”: “GTE”, “value”: query_date } ] } ], “properties”: [“firstname”, “lastname”, “email”], “limit”: 100 }
contacts_response = api_client.crm.contacts.search_api.do_search(public_object_search_request=search_request)
# Process the contacts_response.results...
except Exception as e: print(f”An error occurred: {e}”)
A script like this is perfect for a nightly job. It acts as a safety net, catching any updates your webhooks might have missed and keeping your data consistent over the long haul. This approach is basically a simple form of change data capture, a topic we dive into much deeper in our guide on what is change data capture.
Using Webhooks for Real-Time Event Handling
While APIs are your workhorse for scheduled jobs, webhooks are what make your integration feel alive and responsive. They’re the difference between a passive data mover and an active system that reacts in real time.
A classic RevOps use case? Instantly updating a contact’s subscription status in HubSpot the moment they unsubscribe in Mailchimp. This is crucial for preventing your sales team from accidentally reaching out to someone who just opted out, which is a great way to protect your brand’s reputation.
Here’s how you’d set that up:
- Create a Secure Endpoint: You’ll need to build a small web application—maybe using Flask in Python or an AWS Lambda function—that has a unique URL ready to accept incoming POST requests from Mailchimp.
- Register the Webhook in Mailchimp: Head into your Mailchimp audience settings, plug in your endpoint URL, and subscribe to the events you care about, like
unsubscribes. - Validate and Process the Payload: When someone unsubscribes, Mailchimp will send a JSON payload to your endpoint. Your code’s first job is to make sure the request is legit (usually by checking a secret key) and then pull out the user’s email.
- Update HubSpot via API: Armed with the email from the webhook, your app makes a quick API call to HubSpot, finds the matching contact, and updates their email subscription status.
The real power of webhooks is their immediacy. A lead can fill out a form on your site, get added to HubSpot, synced to a Mailchimp welcome series, and receive their first email in under a minute—all without manual intervention.
This event-driven approach is also incredibly efficient. Instead of constantly hammering the API to ask “anything new yet?”, which eats up resources and puts you at risk of hitting rate limits, your integration just sits back and waits for a meaningful event. This makes your custom Mailchimp integration with HubSpot both faster and way more scalable.
Getting Data Sync and Field Mapping Right
An integration is only as good as the data flowing through it. This is where the real work of building a custom Mailchimp integration with HubSpot really starts. Moving beyond the initial connection, we have to nail the logic of field mapping and data synchronization. If you get this wrong, you’re just building a faster pipeline for garbage data.
The whole point is to create a reliable, two-way street for your data that maintains its integrity across both platforms. This means you have to think deeper than just matching firstname to firstName. You need a solid game plan for custom properties, tricky data types, and—most importantly—preventing a flood of duplicate contacts from wrecking your databases.

Mapping Beyond the Basics
Mapping standard fields is the easy part. It’s the unique, business-specific fields where most integrations stumble and fall. For instance, you might have a custom HubSpot property called “Lead Status” with values like “MQL,” “SQL,” and “Nurture.” Over in Mailchimp, you’re probably using tags to segment your audience for hyper-targeted campaigns.
Your integration has to act as the translator between these two systems. The code needs to have logic built in that says, “When a HubSpot contact’s status changes to ‘SQL’, go add the ‘hot-lead’ tag in Mailchimp.” This requires a crystal-clear, well-documented mapping table that your code can use as its source of truth.
I’ve seen a lot of projects get tangled up in these common scenarios, so plan for them:
- Data Type Mismatches: A HubSpot date property isn’t just a piece of text. It has to be formatted correctly (think ISO 8601) before you can send it to a Mailchimp date field. A simple string copy-paste will just throw an error.
- Dropdowns to Tags: As mentioned, you’ll need to map specific picklist values from a HubSpot property to the right Mailchimp tags or groups.
- Combining Fields: It’s pretty common to need to merge HubSpot’s separate
firstnameandlastnamefields into a singleFNAMEmerge tag for Mailchimp personalization.
One of the biggest mistakes I see is teams jumping into coding without first creating a data dictionary. Seriously, don’t skip this. Document every single field, where it lives, where it’s going, and any rules for changing it along the way. This document becomes the blueprint for your sync logic and is an absolute lifesaver for maintenance down the road.
The Make-or-Break Role of Deduplication
Without a rock-solid deduplication strategy, every data sync is a ticking time bomb. Picture this: a contact updates their email address in Mailchimp. If your integration isn’t smart about it, it might see this as a brand-new person and create a duplicate contact in HubSpot. Now you’ve got their activity history split across two different records. What a mess.
For customer data, the email address is almost always your North Star. It’s the most reliable unique key for matching records between Mailchimp and HubSpot.
Before your code ever creates a new contact, it must look first. The flow should be simple and automatic:
- Get the data (let’s say from a HubSpot webhook).
- Pull out the contact’s email address.
- Ping the Mailchimp API: “Hey, do you have a subscriber with this email?”
- If the answer is yes, run an update (using a PATCH or PUT request).
- If the answer is no, go ahead and create a new one (using a POST request).
This “lookup-then-act” pattern is the absolute foundation of clean data sync. It’s what stops the rampant duplication that plagues so many homegrown integrations.
Building an Idempotent Sync
Beyond just deduplication, you need to think about idempotency. It’s a fancy-sounding word for a simple concept: making the same request multiple times should have the exact same result as making it just once. Why does this matter? Because in the real world, things go wrong. Network glitches, server timeouts, and your own retry logic can easily cause your integration to fire the same update command twice.
Without idempotency, a “add 5 to lead score” request sent twice would mistakenly add 10. A “create new contact” request sent twice would either create a duplicate or, more likely, fail with an error on the second try.
Now, Mailchimp’s API doesn’t offer a simple “idempotency key” header like some payment gateways do. That means the burden falls on your application’s logic to handle it. And this brings us right back to the importance of the “lookup-then-act” pattern. By always checking if a contact exists before you try to create one, you’re inherently building an idempotent process. It guarantees that even if a “create” event fires multiple times for the same person, you’ll only ever end up with one contact in the destination system. That’s how you keep your data clean and your operations running smoothly.
Building for Resilience: Rate Limits and Error Handling
Sooner or later, every integration breaks. It’s just a fact of life. A network will hiccup, an API will have a momentary blip, or a massive data import will throw a wrench in the works. A fragile sync will simply fall over. A resilient one, however, is built with these failures in mind from the very beginning.
Building a solid Mailchimp integration with HubSpot is all about planning for those bumps in the road. You need a system that can handle errors gracefully, retry intelligently, and shout for help when something is truly broken. For a RevOps team, this isn’t a “nice-to-have”—it’s a core requirement for a data pipeline anyone can actually trust. A silent failure can poison your contact lists and leave your sales team working with bad data.
Don’t Get Blacklisted: Respecting API Rate Limits
Both HubSpot and Mailchimp use rate limits to keep their APIs stable for everyone. Think of it as a traffic cop for data. If you send too many requests too quickly, they’ll hand you a 429 Too Many Requests error and put you in a timeout. Ignoring these limits is the fastest way to get your integration temporarily (or even permanently) blocked.
The first step is knowing the rules of the road, and they’re not the same for each platform.
API Rate Limit Comparison
It’s really important to see how differently these two platforms approach rate limiting. This will directly influence how you design your sync logic, especially for bulk updates.
| Platform | API Limit Type | Default Limit | Time Window |
|---|---|---|---|
| HubSpot | Requests per 10 seconds | 100 requests (standard API) | 10 seconds |
| Mailchimp | Concurrent connections | 10 simultaneous connections | N/A (at one time) |
As you can see, HubSpot gives you a specific budget of requests every 10 seconds. Mailchimp, on the other hand, cares more about how many things you’re trying to do at the exact same instant. A high-volume sync could easily blow past HubSpot’s limit if you’re not careful. This is where thoughtful coding comes in.
My rule of thumb? Never just “send and forget.” You absolutely have to build throttling logic directly into your code. A simple
sleepcommand between batches or a more sophisticated queue can be the difference between a smooth-running integration and a blocked IP address.
”Try, Try Again”: Exponential Backoff and Queuing
Okay, so what do you do when you inevitably hit a rate limit? Your code shouldn’t just crash and burn. The gold standard here is an exponential backoff strategy.
It sounds fancy, but the concept is simple:
- If a request fails, wait a second and try again.
- Fails again? Wait a little longer, maybe 2 seconds.
- Still no luck? Double it again to 4 seconds, and so on.
This approach gives the API time to breathe and prevents your script from hammering a service that’s already struggling.
For bigger, more complex integrations, a simple retry loop won’t cut it. When you’re dealing with a flood of webhook events or a massive nightly data sync, you need a proper queuing system. Tools like RabbitMQ or Amazon SQS act as a buffer zone for your data. Instead of trying to process everything the moment it arrives, your app pushes events into a queue. A separate “worker” process then pulls from that queue at a controlled pace, guaranteeing you never overwhelm the API. This completely decouples receiving an event from processing it, making your whole system far more reliable.
When to Retry and When to Panic: Smart Error Handling
A truly resilient integration is one that tells you when it’s in trouble. Don’t let fatal errors die silently in a log file no one ever looks at. Your code needs to be smart enough to distinguish between different kinds of failures.
A 429 rate limit error, for example, is a temporary problem. That’s your cue to trigger the exponential backoff logic. But a 400 Bad Request error is a different beast entirely. That usually means something is wrong with the data itself—like a malformed email address. Retrying that is pointless; it will just fail again. Instead, that kind of error should be logged with as much context as possible and moved to a “dead-letter queue” for a human to review later.
The final piece is knowing when to ask for help. Connect your logging system to a tool like Slack or PagerDuty. Set up alerts so that when a critical error pops up—or when you see more than a handful of a certain error in a short time—your team gets a notification immediately. This proactive monitoring is what lets you fix small issues before they snowball into massive business problems.
It’s this operational rigor that drives real growth. Unifying data helps teams achieve some pretty impressive results. In fact, HubSpot customers have reported up to a 107% increase in leads and a mind-boggling 11,000% increase in emails opened after getting their marketing automation in sync. You can read more about these HubSpot customer achievements and see the potential impact for yourself.
Testing and Monitoring Your Live Integration

Getting your integration live isn’t the finish line—it’s the starting pistol. The real work begins now. A successful Mailchimp integration with HubSpot lives or dies by your commitment to rigorous testing and proactive monitoring. If you’re not watching it, you’re just waiting for a sales rep to complain about bad data before you realize something’s broken.
A healthy integration is a predictable one. Your team has to trust the data it produces, and that trust is built on a safety net that catches problems before they ever hit your production environment.
Staging Environments Are Non-Negotiable
I’ll say this as clearly as I can: never, ever test on your live data. The risk of corrupting thousands of contact records or firing off a massive, unwanted email campaign is just too high. It’s a rookie mistake with serious consequences.
Both HubSpot and Mailchimp offer sandbox accounts for a reason. Use them. Your mission is to clone your production setup as closely as possible—replicate your custom properties, your workflows, and your audience lists. This staging environment is where you can safely break things, test new field mappings, and troubleshoot bugs without any real-world fallout.
A dedicated staging environment isn’t a nice-to-have; it’s a professional requirement. It’s the difference between deploying updates with confidence and just crossing your fingers.
Once your sandbox is set up, you can run realistic tests that follow a piece of data from its source all the way to its destination. Don’t just check if a contact syncs; deliberately test the weird edge cases that you know are going to cause trouble down the line.
A Practical End-to-End Testing Checklist
Your test plan should be laser-focused on the most critical user journeys and common failure points. Before you push any significant change, run through a checklist that confirms the basics are still working perfectly.
- New Contact Creation: You create a contact in HubSpot. Does it show up in the right Mailchimp audience with every single mapped field populated correctly?
- Property Updates: You change a HubSpot contact’s “Lead Status” from MQL to SQL. Does that instantly update the corresponding tag or merge field in Mailchimp? How fast?
- Unsubscribe Sync: A user clicks “unsubscribe” in a Mailchimp email. Is that contact’s status updated in HubSpot almost immediately? This is a huge compliance issue.
- Email Re-subscribe: What happens when someone who previously unsubscribed fills out a new HubSpot form? Does your logic correctly handle re-subscribing them in Mailchimp without a hiccup?
Building Your Monitoring Dashboard and Runbook
After you go live, your job shifts from active testing to active monitoring. You need a window into the real-time health of your integration. A simple dashboard tracking API call volume, error rates, and sync latency can tell you almost everything you need to know. There are plenty of great data pipeline monitoring tools out there that can provide this visibility so you don’t have to build it from scratch.
This dashboard is the eyes and ears of your runbook. A runbook is your team’s playbook for when things go wrong. It’s a living document that spells out exactly how to diagnose a sync failure, who to call when a critical error pops up, and what routine maintenance needs to be done. With a solid runbook, a potential crisis just becomes another manageable task on the to-do list.
Common Questions When Integrating HubSpot and Mailchimp
When you’re trying to get HubSpot and Mailchimp to play nicely together, a few common questions always seem to pop up. Let’s tackle the ones we hear most often from RevOps teams who are deep in the trenches of integration.
Can I Get a Real-Time, Two-Way Sync?
The short answer is yes, but it’s not something you’ll get out of the box. Most native connectors are built for one-way data pushes or syncs that run on a schedule, like every hour.
If you need data to flow back and forth instantly, you’re looking at a custom build. This usually means setting up webhooks in both platforms to listen for changes. The real trick is building smart logic to avoid the dreaded “infinite loop,” where an update in HubSpot triggers an update in Mailchimp, which then triggers the original update in HubSpot… and on and on.
Pro Tip: We always recommend establishing a “source of truth” for specific data fields. For instance, let HubSpot own all core contact details (like name and company), but let Mailchimp be the definitive source for email engagement and subscription status. This simple rule prevents a lot of headaches and data conflicts down the road.
What’s the Biggest Field Mapping Mistake People Make?
Hands down, the most common and damaging mistake is ignoring data type mismatches. It seems obvious, but we see it all the time. Someone tries to sync a free-text field from HubSpot, where users can type anything, into a neat, structured dropdown menu in Mailchimp. That’s a direct flight to Sync Error City.
Before you even think about mapping, you need to do a full audit of your fields in both systems.
- Are the data types compatible? (e.g., text to text, date to date)
- Do you need to standardize formats? (e.g., converting “California,” “cali,” and “CA” all to the proper “CA” before the data moves)
Taking the time to clean up and align your data before you build the connection will save you countless hours of troubleshooting later.
At RevOps JET, we build the production-grade custom integrations that off-the-shelf connectors can’t handle. Stop fighting with limited tools and let our on-demand engineering team build the resilient data pipelines you need. Learn more about our custom integration services.